NestJs - 소셜로그인 구현(google login) 본문
2023.02.11 - [코딩/알쓸코잡] - 소셜 로그인 프로세스
미래의 나에게
구글 passport-oauth 설치
// 구글
yarn add passport-google-oauth20
yarn add --dev @types/passport-google-oauth20

// 카카오
yarn add --dev @types/passport-kakao
yarn add passport-kakao

// 네이버
yarn add passport-naver-v2
yarn add --dev @types/passport-naver
오늘은 소셜 로그인 구현에 대해 포스팅한다.
구현에 대한 구체적인 과정은 위에 링크를 남겨두었다.
먼저, 내가 직접 구글로그인이 정상실행되는지 확인할 수 있도록 프론트엔드에서 보여지는 html 을 간단히 만든다.
1. 이때 API 구현 방식은 rest-API 로 작성할 것이기 때문에 엔드포인트를 링크에 담아 직접 기입해둔다.
2. 또한 rest-API 를 다룰 것이기 때문에, resolver가 아닌 controller.ts ,
3. google jwt 를 전략패턴으로 활용하기 위해 commons/jwt-social-google.strategy.ts 를 생성한다.
html
// social-login.html
<a href="http://localhost:3000/login/google">구글로그인</a>
passport
// commons/jwt-social-google.strategy.ts


// 검증을 위한 passport // guard 는 전에 작성한 것을 활용

import { PassportStrategy } from '@nestjs/passport';
import { Strategy } from 'passport-jwt';

export class JwtGoogleStrategy extends PassportStrategy(Strategy, 'google') {
  // 인증 과정
  constructor() {
    super({
      // 부모에게 시크릿코드 전달 // PassportStrategy 가 다 해줌
      clientID: process.env.GOOGLE_CLIENT_ID, // client 애플리케이션의 id
      clientSecret: process.env.GOOGLE_CLIENT_PASSWORD,
      callbackURL: 'http://localhost:3000/login/google', // 시크릿 코드 인증 후 돌아올 URL
      scope: ['email', 'profile'], // scope 토큰에 할당된 OAuth 범위 // 받고자 하는 정보들
    });
  }

  // 인증 후
  // 구글에서 받아온 각 토큰과 프로필 받을 수 있음
  validate(accessToken, refreshToken, profile) {
    console.log('accessToken', accessToken);
    console.log('refreshToken', refreshToken);
    console.log('profile', profile);

    // return 시, req.user = {} 안에 들어가게 됨
    return {
      name: '임시',
      email: '임시',
      hashedPassword: '임시',
      age: 10,
    };
  }
}
controller
// controller.ts

import { Controller, Get, Req, Res, UseGuards } from '@nestjs/common';
import { AuthGuard } from '@nestjs/passport';
import { Request, Response } from 'express';
import { UsersService } from '../users/users.service';
import { AuthService } from './auth.service';

@Controller()
export class AuthContoller {
  constructor(
    private readonly usersService: UsersService, // DB정보 확인&회원가입을 위한 DI
    private readonly authService: AuthService, // refresh토큰 발급을 위한 DI
  ) {}

  @UseGuards(AuthGuard('google'))
  @Get('/login/google') // 엔드포인트 작성
  async loginGoogle(
    @Req() req: Request & IAuthUser, //
    @Res() res: Response, //
  ) {
    // 1. 회원 조회
    let user = await this.usersService.findOne({ email: req.user.email });

    // 2. 회원이 아닐 시 회원가입
    if (!user)
      user = await this.usersService.create({
        ...req.user,
        // name: req.user.name,
        // email: req.user.email,
        // hashedPassword: req.user.hashedPassword,
        // age: req.user.age,
      });

    // 3. 회원가입이 완료되어 있다면 로그인하기 (refreshToken, accessToken 만들어서 브라우저에 전송)
    this.authService.setRefreshToken({ user, res });
    res.redirect(	// 로그인 완료 시 우리 페이지로 들어오게 하기 위한 redirect
      '돌아올 URL주소.html',
    );
  }
}

interface IAuthUser { // 회원가입할 시 셋팅해둔 인터페이스와 같음
  user: {
    name: string;
    email: string;
    hashedPassword: string;
    age: number;
  };
}
auth.module에 의존성 주입
// auth.module.ts

@Module({
  imports: [
    JwtModule.register({}),
    TypeOrmModule.forFeature([
      User, //
    ]),
  ],
  providers: [
   // 중략 //
  ],
  controllers: [
    AuthContoller, // 컨트롤러이므로 컨트롤러에 추가
  ],
})
export class AuthModule {}
이제 실행시켜주었는데, 아래와 같은 오류로 서버가 실행되지 않았다.

찾다보니, google-Oauth 라이브러리를 잘 다운받아 두고 사용하지 않고 있었던 것 ;
// commons/jwt-social-google.strategy.ts

import { Strategy } from 'passport-google-oauth20'; // 수정
// import { Strategy } from 'passport-jwt';
위와 같이 수정해주니 정상 작동되었다.
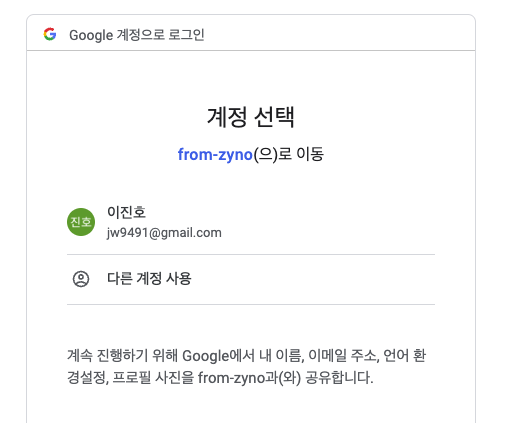
html 내 하이퍼링크를 클릭한 경우 나타난 연동화면
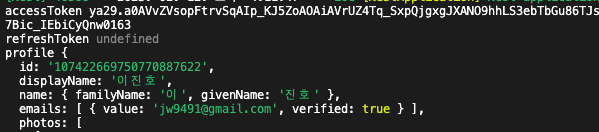
클릭 시 vaildate에서 콘솔로 찍어둔 데이터가 등장한다.
이제 '임시'로 작성해두었던 코드를, 유저 데이터로 직접받아와 DB에 저장할 수 있게 수정해준다.
// jwt-social-google.strategy.ts

validate(accessToken, refreshToken, profile) {
    return {
      name: profile.displayName, // 수정
      email: profile.emails[0].value, // 수정
      hashedPassword: '알 수 없음',
      age: 20,
    };
  }
위와 같은 과정이 끝나면 회원 가입 시 아래와 같이 DB에 저장되게 된다.

http://www.passportjs.org/packages/passport-google-oauth/
passport-google-oauth
Google (OAuth) authentication strategies for Passport.
www.passportjs.org
https://github.com/jaredhanson/passport-google-oauth2
GitHub - jaredhanson/passport-google-oauth2: Google authentication strategy for Passport and Node.js.
Google authentication strategy for Passport and Node.js. - GitHub - jaredhanson/passport-google-oauth2: Google authentication strategy for Passport and Node.js.
github.com
'개발 > nest.js' 카테고리의 다른 글
| NestJs - 로그아웃 프로세스 구현 / docker를 사용한 redis (0) | 2023.02.22 |
|---|---|
| NestJs - 결제 프로세스 구현 / 포트원 & 카카오페이 (0) | 2023.02.14 |
| NestJS - login process 구현 (refresh Token) (0) | 2023.02.12 |
| NestJs - JWT 사용한 인증 & 인가 처리 (access token) (0) | 2023.02.12 |
| Nest JS - 회원 API 구현 (hashing & ConflictException) (0) | 2023.02.10 |


